taylor cooking thermometer instructions
Taylor Cooking Thermometer Instructions: A Comprehensive Guide
Welcome! This comprehensive guide provides detailed instructions for using your Taylor cooking thermometer. From initial setup to advanced features‚ we cover everything you need for accurate food temperature monitoring. Master safe and precise cooking!
Taylor digital cooking thermometers offer precision and reliability for culinary enthusiasts and professionals alike. These thermometers accurately measure the internal temperature of food‚ ensuring safety and optimal doneness. With various models available‚ Taylor provides solutions for diverse cooking needs‚ from grilling to baking. These devices often include features like alarms and timers‚ enhancing the cooking process. Understanding your Taylor thermometer’s capabilities is key to achieving perfectly cooked meals every time. Proper use ensures food safety by meeting USDA recommended temperatures.
Overview of Taylor Thermometer Models
Taylor offers a diverse range of digital thermometers‚ each designed for specific cooking applications. Models include folding probe thermometers‚ ideal for quick temperature checks‚ and waterproof thermometers for added durability. Some feature Bluetooth connectivity‚ integrating with apps like SmarTemp for advanced monitoring and data logging. The Taylor 9847N is a handheld model known for its accuracy. Understanding the features of each model is crucial. Whether you need a simple‚ reliable thermometer or one with advanced capabilities‚ Taylor has a model to suit your cooking needs‚ ensuring perfectly cooked meals every time.

Understanding Your Taylor Thermometer
Before use‚ familiarize yourself with your Taylor thermometer. Knowing its features and functions ensures accurate temperature readings and optimal performance. Understanding components is key to effective operation and maintenance.
Key Features and Functions
Taylor digital thermometers boast features like accurate temperature readings‚ selectable Celsius/Fahrenheit units‚ and timer functions. Some models include a folding probe for safe storage and easy use. Certain thermometers offer waterproof designs for durability and easy cleaning. Many feature an alarm to signal when the target temperature is reached‚ aiding in preventing overcooking. Advanced models incorporate Bluetooth connectivity‚ pairing with apps to monitor cooking progress remotely. Explore your thermometer’s specific functions for optimal results and enhanced cooking precision‚ following the included instruction manual for tailored guidance.
Components of a Taylor Digital Thermometer
A typical Taylor digital thermometer consists of several key components. The probe‚ usually made of stainless steel‚ measures the food’s internal temperature. The display screen shows the temperature reading‚ often in large‚ easy-to-read digits. Buttons allow users to turn the device on/off‚ select temperature units‚ and set timers or target temperatures. The housing protects the internal electronics and often includes a battery compartment. Some models feature a folding probe for compact storage and preventing damage. Understanding each component’s role helps in operating the thermometer effectively and maintaining its longevity‚ as outlined in the user manual.
Initial Setup and Battery Installation
Before using your Taylor thermometer‚ install batteries following the manual’s instructions. Ensure correct polarity. Proper initial setup guarantees accurate readings and optimal performance for your cooking needs.
Battery Replacement Procedures
When your Taylor thermometer displays a low battery indicator‚ replacement is necessary. Locate the battery compartment‚ often secured with a small screw. Remove the screw and the tray. Take out the old battery. Insert the new battery‚ ensuring correct polarity as indicated inside the compartment. Replace the tray and secure it with the screw. Properly dispose of the old battery according to local regulations. Refer to your specific model’s manual for detailed illustrations and specific battery type requirements to maintain accuracy and prevent damage during the replacement process.

Operating Instructions
This section details the operation of your Taylor thermometer. Learn to power on/off‚ select temperature units (Celsius/Fahrenheit)‚ and use the probe correctly for accurate readings. Master these steps for optimal performance.
Turning the Thermometer On/Off
To turn your Taylor digital cooking thermometer on‚ locate the power button‚ typically marked with an “On/Off” symbol. Press and hold this button for a second or two until the display illuminates. The thermometer is now ready for use. To turn the thermometer off‚ repeat the same process: press and hold the power button until the display goes blank. Conserving battery power is essential‚ so remember to switch off the device after each use. Some models might feature an auto-off function after a period of inactivity.
Selecting Temperature Units (Celsius/Fahrenheit)
Your Taylor digital cooking thermometer allows you to display temperature readings in either Celsius (°C) or Fahrenheit (°F). To switch between these units‚ find the “°C/°F” button on the device. Typically‚ a short press of this button will toggle the display between the two temperature scales. The currently selected unit will be indicated on the screen‚ usually with a small “°C” or “°F” symbol. Ensure you select the appropriate unit before taking readings for accurate cooking and recipe adherence. This selection remains until changed.
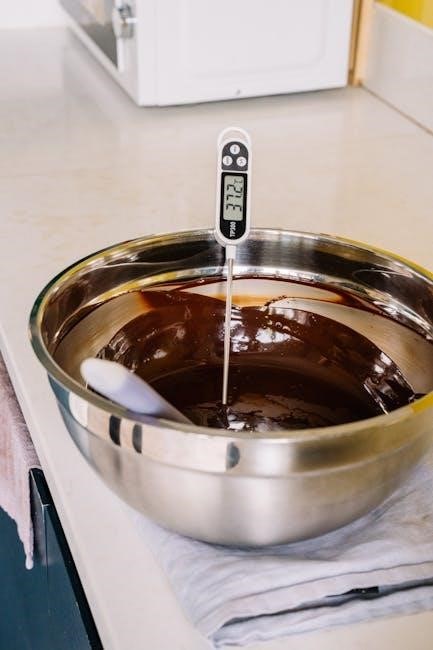
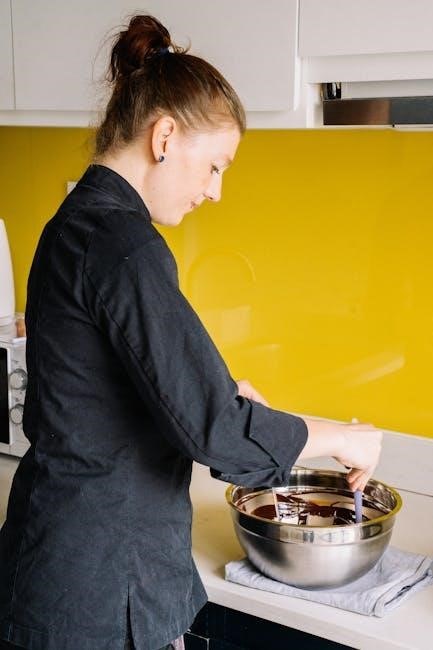
Using the Probe for Accurate Readings
To ensure accurate temperature readings‚ proper probe placement is crucial. Insert the probe into the thickest part of the food‚ avoiding bone‚ fat‚ or gristle. For meat‚ the center is typically the best location. Ensure the probe is inserted at least 1/2 inch deep to get a reliable reading. Hold the probe steady and wait for the temperature to stabilize on the display. Avoid touching hot surfaces with the thermometer body. After each use‚ clean the probe thoroughly to prevent contamination and maintain accuracy for future cooking tasks.

Cooking and Temperature Monitoring
Accurate temperature monitoring is key to safe and delicious cooking. Use your Taylor thermometer to ensure meats reach USDA-recommended temperatures‚ preventing foodborne illness and achieving perfect doneness every time.
Setting Target Temperatures
Setting target temperatures on your Taylor cooking thermometer is crucial for achieving optimal cooking results. Consult a reliable source‚ such as the USDA guidelines‚ to determine the safe internal temperature for the specific food you’re preparing. Most Taylor thermometers allow you to pre-set a target temperature. Once set‚ the thermometer will alarm when the food reaches that temperature. This prevents overcooking and ensures food safety. This feature is especially helpful for meats‚ poultry‚ and other foods that require precise cooking temperatures to avoid harmful bacteria. Utilizing this function effectively will help ensure consistently perfect results.
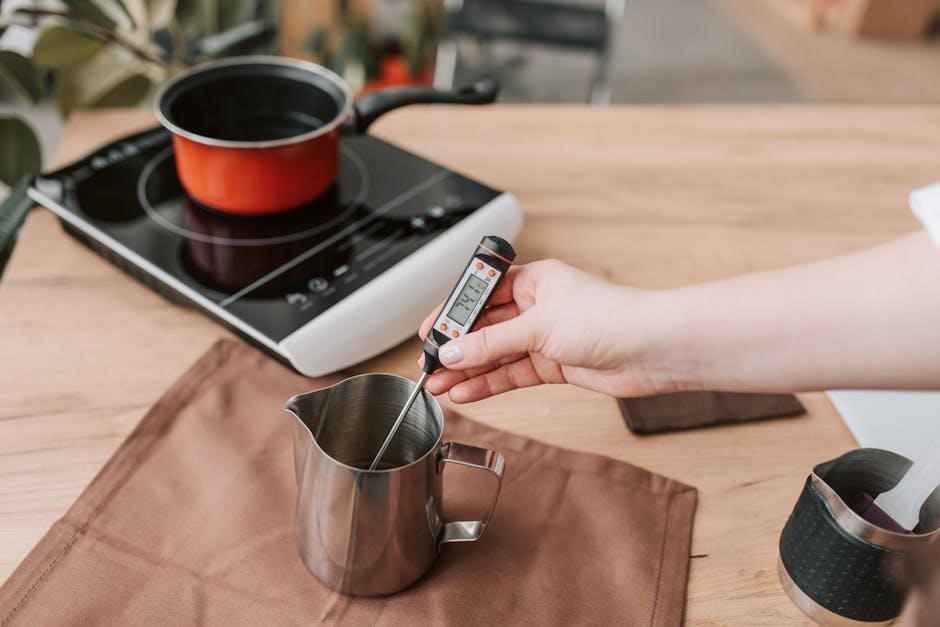
Monitoring Food Temperature During Cooking
Effectively monitoring food temperature during cooking with your Taylor thermometer ensures both safety and desired doneness. Insert the probe into the thickest part of the food‚ avoiding bone. Observe the temperature display regularly as the food cooks. Many Taylor thermometers offer continuous temperature monitoring. This allows you to track the internal temperature’s progress. For roasts or large cuts of meat‚ check the temperature in multiple locations to confirm even cooking. Maintaining vigilance throughout the cooking process helps prevent overcooking or undercooking‚ guaranteeing a delicious and safely prepared meal. Proper monitoring is vital for achieving optimal results.
Understanding USDA Recommended Temperatures
Adhering to USDA recommended internal temperatures is crucial for food safety. Your Taylor thermometer assists in achieving these guidelines. The USDA provides specific temperature recommendations for various foods‚ including meat‚ poultry‚ seafood‚ and eggs. These guidelines ensure that harmful bacteria are destroyed during cooking. For instance‚ poultry should reach 165°F‚ while ground beef needs to reach 160°F. Refer to the USDA website or app for a complete list. Always verify that the thickest part of the food reaches the recommended temperature. Ignoring these guidelines can increase the risk of foodborne illness. Use your Taylor thermometer diligently to protect your health.
Timer Functionality
Many Taylor cooking thermometers include a timer feature. This allows you to track cooking time alongside temperature. Set the timer for precise cooking control and receive alerts when time is up.
Setting the Timer
To set the timer on your Taylor thermometer‚ locate the timer buttons‚ usually labeled “HR” and “MIN”. Press these buttons to adjust the desired hours and minutes; Some models may also have a “SEC” button for seconds. Once the desired time is set‚ press the “START/STOP” button to begin the countdown. Many thermometers feature an audible alarm that will sound once the timer reaches zero‚ signaling the end of the set cooking time. Refer to your specific model’s manual for precise instructions.
Using the Timer in Conjunction with the Thermometer
Maximize your Taylor thermometer by using the timer alongside temperature monitoring. Set a target temperature for your food‚ then use the timer to track cooking duration. This ensures food reaches the safe internal temperature advised by the USDA while also preventing overcooking. Monitor both temperature and time‚ adjusting as needed based on your recipe and oven performance. The alarm will signal when either the target temperature is reached or the timer expires‚ providing comprehensive cooking control. This is ideal for roasting meats or baking.
Maintenance and Care
Proper maintenance ensures longevity and accuracy. Regularly clean the probe to prevent residue buildup. Store your thermometer in a dry place. These simple steps maintain your Taylor thermometer’s performance.
Cleaning Your Taylor Thermometer
Maintaining a clean Taylor thermometer is crucial for accurate readings and preventing contamination. After each use‚ promptly clean the probe with a damp cloth or sponge. For stubborn residue‚ use mild soap and warm water. Ensure you rinse thoroughly to remove any soap residue. The Taylor 9847N Digital Thermometer boasts a waterproof design‚ offering added durability and ease during the cleaning process. However‚ avoid immersing the entire thermometer body unless it is specifically designed as waterproof. Dry all components completely before storing to prevent moisture damage and ensure hygienic use for future cooking endeavors.
Proper Storage Techniques
To ensure the longevity and accuracy of your Taylor digital cooking thermometer‚ proper storage is essential. Store the thermometer in a clean‚ dry place‚ away from extreme temperatures or direct sunlight. Consider using a protective case or sleeve to prevent damage to the probe and display screen. Avoid wrapping the probe cord too tightly‚ as this can cause damage over time. Remove the batteries if you plan to store the thermometer for an extended period to prevent corrosion. By following these storage techniques‚ you can maintain your thermometer’s optimal performance and reliability for years to come.
Troubleshooting Common Issues
Encountering problems with your Taylor thermometer? This section addresses common issues like inaccurate readings and display problems. Find solutions to ensure accurate temperature monitoring and optimal performance from your device.
Addressing Inaccurate Readings
If your Taylor thermometer displays inaccurate readings‚ first‚ ensure the probe is correctly positioned within the food‚ avoiding bone or fat; Verify that you have selected the correct temperature unit (Celsius or Fahrenheit). Calibrate the thermometer if necessary‚ following the manual’s instructions. Check the battery level‚ as a low battery can affect accuracy. Confirm that the probe is clean and free from debris. If issues persist‚ consult the manual or Taylor’s online resources for further troubleshooting steps. Ensure the thermometer is rated for the temperature range you are measuring. Extreme temperatures can affect the sensor.
Fixing Display Problems
Encountering display issues with your Taylor thermometer? First‚ replace the battery‚ as a weak battery is a common culprit. Ensure the battery is correctly installed‚ matching polarity. If the display is dim or flickering‚ this likely indicates low power. Check for any physical damage to the display screen. If condensation or moisture is present‚ dry the thermometer thoroughly. Try resetting the thermometer by removing the battery for a few minutes‚ then reinserting it. If the display remains blank or unreadable‚ consult the Taylor website for support‚ or refer to the user manual for specific troubleshooting steps.

Advanced Features (If Applicable)
Some Taylor thermometers offer advanced features like Bluetooth connectivity‚ app integration (SmarTemp)‚ and USDA temperature presets. Explore these functionalities for enhanced cooking control and data logging capabilities‚ if your model includes them.
Bluetooth Connectivity and App Integration
Certain Taylor digital thermometers boast Bluetooth connectivity‚ enabling seamless integration with smartphone apps like SmarTemp. This advanced feature allows you to remotely monitor cooking temperatures‚ set custom alerts‚ and access a wealth of culinary resources. The app often provides real-time temperature graphs‚ USDA recommended temperatures‚ and customizable cooking profiles.
Connecting your thermometer to the app expands its functionality‚ offering a more interactive and data-driven cooking experience. Check your thermometer’s manual or packaging to confirm Bluetooth compatibility and app details. Enjoy the convenience and precision of app-enabled temperature monitoring!
Exploring SmarTemp App Features
The SmarTemp app‚ designed for use with compatible Taylor thermometers‚ offers a suite of features to enhance your cooking experience. The “HOME” screen facilitates Bluetooth connection and provides access to the user manual. The “COOKING” screen allows you to set target temperatures and monitor food in real-time.
The “TIMER” screen lets you manage cooking times‚ while “HISTORY” tracks previous cooking sessions. You can also “SHARE” your culinary creations and customize app settings in the “SETTINGS” screen. Furthermore‚ the app may include USDA recommended temperatures and other helpful cooking information for optimal results.
Safety Precautions
Prioritize safety by handling the probe carefully to avoid burns. Prevent thermometer damage by avoiding extreme temperatures. Always clean the probe after each use to maintain hygiene and accuracy.
Safe Handling of the Probe
Always exercise caution when handling the Taylor thermometer probe‚ as it can become extremely hot during cooking. Use oven mitts or heat-resistant gloves to prevent burns. Avoid touching the probe immediately after removing it from hot food or ovens. Ensure the probe is fully inserted into the food to obtain accurate temperature readings‚ but be careful not to puncture yourself. Never leave the probe unattended near children or pets. Remember to sterilize the probe after each use for food safety. Proper handling ensures both your safety and the thermometer’s longevity.
Preventing Damage to the Thermometer
To prevent damage to your Taylor thermometer‚ avoid exposing it to extreme temperatures or direct flame. Do not immerse the thermometer body in water unless it’s specifically designed as waterproof‚ like the Taylor 9847N model. Handle the probe carefully to prevent bending or breakage. When not in use‚ store the thermometer in a safe place away from sharp objects or heavy items that could cause damage. Regularly check the battery compartment for corrosion. Replace batteries promptly when needed. Proper storage and gentle handling will extend the life of your thermometer.

Finding Your Taylor Thermometer Manual
Need your Taylor thermometer manual? Check the Taylor website for digital versions. Many models‚ like the digital folding probe thermometer‚ have manuals available online for easy access and download.
Online Resources for Manuals
Finding your Taylor thermometer manual online is straightforward. Start by visiting the official Taylor Precision Products website. Look for a “Support” or “Downloads” section‚ where you can typically find manuals categorized by product type or model number. If you know your thermometer’s model number (often found on the device itself)‚ enter it into the search bar on the website.
Alternatively‚ try searching online using a search engine like Google. Type in “Taylor thermometer manual” followed by your specific model number. PDF versions of manuals are often available from third-party websites or online retailers.