ez wiring harness instructions
Welcome to the EZ Wiring Harness Instructions guide. This comprehensive manual helps you understand and install the EZ Wiring Harness system efficiently.
1.1 Overview of EZ Wiring Harness
The EZ Wiring Harness is a popular, universal wiring system designed for various vehicles, including classic cars, trucks, and hot rods. It offers a pre-wired, plug-and-play solution that simplifies electrical system installation. The harness is known for its durability, flexibility, and ease of use, making it a favorite among DIY enthusiasts and professionals. With multiple circuits pre-configured, it supports essential vehicle functions like headlights, turn signals, brakes, and gauges. The kit includes a fuse panel, color-coded wires, and detailed instructions, ensuring a streamlined process. Its universal design allows compatibility with a wide range of vehicles, while the comprehensive wiring layout minimizes the risk of electrical errors. Whether you’re restoring a classic or upgrading a modern vehicle, the EZ Wiring Harness provides a reliable and efficient solution for your wiring needs.
1.2 Importance of Proper Installation
Proper installation of the EZ Wiring Harness is crucial to ensure the electrical system functions safely and reliably. Incorrect wiring can lead to short circuits, electrical fires, or damage to components. A well-installed harness prevents these risks and guarantees optimal performance of vehicle systems like lights, gauges, and accessories. Proper connections also minimize the risk of intermittent issues, ensuring long-term reliability. Additionally, correct installation simplifies future modifications or upgrades, as the system remains organized and easy to understand. Following the instructions closely ensures compliance with safety standards and avoids potential hazards. Proper installation is not just about functionality; it also enhances the overall driving experience by eliminating electrical faults. By adhering to the guidelines, you protect your investment and ensure a trouble-free operation of your vehicle’s electrical systems. Always prioritize precision and care during the installation process to reap these benefits.

Understanding the EZ Wiring Harness Components
The EZ Wiring Harness includes a fuse panel, wires, connectors, and circuit protectors, designed to simplify electrical system installation and ensure reliable connectivity for vehicle components.
2.1 Key Features of the Harness
The EZ Wiring Harness is renowned for its simplicity and effectiveness, featuring pre-labeled wires, a compact fuse panel, and weather-resistant connectors. Its plug-and-play design minimizes the need for complex wiring knowledge, making it ideal for DIY installations. The harness includes a built-in circuit breaker system to protect against overloads and short circuits. It also offers flexibility, allowing for easy customization to suit various vehicle configurations. The color-coded wires enhance readability, reducing the risk of wiring errors. Additionally, the harness is constructed with high-quality materials, ensuring durability and long-term reliability. These features collectively make the EZ Wiring Harness a preferred choice for automotive enthusiasts and professionals alike, providing a streamlined and efficient electrical system solution.
2.2 Circuit Breakdown
The EZ Wiring Harness is designed with a clear circuit breakdown to ensure easy identification and connection of each electrical component. The harness typically includes circuits for essential systems such as headlights, taillights, turn signals, and interior lighting. Additionally, it accommodates accessory circuits for items like radios, fans, and auxiliary power outlets. Each circuit is protected by a corresponding fuse or circuit breaker, located in the fuse panel, to prevent overloads and short circuits. The wiring is organized into logical groups, making it easier to trace and connect. This structured approach minimizes confusion and ensures that each component receives the correct power supply. By understanding the circuit breakdown, users can efficiently install and troubleshoot their wiring system, ensuring reliable performance and safety. This clear organization is a hallmark of the EZ Wiring Harness, catering to both novice and experienced installers.
2.3 Wire Color Coding and Functions
The EZ Wiring Harness uses a standardized wire color coding system to simplify installation and ensure accuracy. Each wire is color-coded to indicate its specific function, eliminating guesswork. For example, red wires typically denote positive or “hot” leads, while black wires are usually ground connections. Yellow wires often control lighting systems, such as headlights or turn signals, and brown wires may power interior lights or accessories. Green and blue wires are commonly used for auxiliary circuits, like fans or radios. White wires often serve as signal wires for components like gauges or sensors. This color coding system ensures that each wire is connected to the correct component, reducing the risk of electrical faults. Always reference the provided wiring diagram or manual to confirm the specific functions of each color in your harness. This system is a key feature of the EZ Wiring Harness, making it user-friendly and efficient.

Preparing for Installation
Proper preparation ensures a smooth installation process. Gather all tools, disconnect the battery, and set up a clean, organized workspace. Review the manual thoroughly beforehand.
3.1 Tools and Materials Needed
To install the EZ Wiring Harness, you’ll need specific tools and materials. Essential items include screwdrivers (Phillips and flathead), pliers, wire strippers, and a wrench set. A multimeter can help test connections.
Additional supplies like electrical tape, heat shrink tubing, and zip ties are crucial for securing wires. Ensure you have a clean workspace and a wiring diagram for reference. Safety gear, such as gloves and safety glasses, is highly recommended.
Optional tools include a soldering iron for custom connections and a crimper for terminals. Gather all materials beforehand to avoid delays. Double-check the harness kit for any missing components before starting. Proper preparation ensures efficiency and accuracy during installation.
3.2 Safety Precautions
Before starting the installation, ensure your safety and the integrity of the wiring harness. Always disconnect the battery to prevent electrical shocks or short circuits.
Wear protective gear, including gloves and safety glasses, to safeguard against potential hazards. Avoid working in cramped or poorly lit spaces, as this can lead to accidents or errors.
Keep flammable materials away from the workspace, and never smoke while handling electrical components. Follow the manufacturer’s guidelines for tool usage and wiring practices.
Never force connections or bend wires excessively, as this can damage the harness. If you’re unsure about any step, consult the instructions or seek professional assistance.
Finally, double-check all connections before restoring power to avoid malfunctions or electrical fires. Safety should always be your top priority when working with wiring systems.
3.3 Workspace Setup
A well-organized workspace is essential for a smooth EZ Wiring Harness installation. Begin by clearing a large, flat surface, such as a workbench, to lay out the harness and components. Ensure the area is clean and free from debris to prevent contamination or damage to wires.
Position the vehicle in a well-ventilated space, away from flammable materials. Use a vice or clamps to secure the harness, making it easier to work with. Proper lighting is crucial; consider using a LED work light to illuminate the workspace.
Keep all tools and materials within easy reach to minimize distractions and save time. Labeling the wires and components as you unpack them can help maintain organization.
Avoid working in cramped or uncomfortable conditions, as this can lead to mistakes. Finally, ensure the workspace is free from moisture to prevent electrical issues during installation. A clean, organized workspace ensures efficiency and reduces the risk of errors.
Step-by-Step Installation Guide
This section provides a detailed, sequential approach to installing the EZ Wiring Harness, ensuring a straightforward process for beginners and experienced technicians alike.
From unpacking to final testing, each step is carefully outlined to guarantee a safe and efficient installation.
Follow the guide systematically to avoid errors and ensure all components function correctly.

4.1 Unpacking and Organizing the Harness
Start by carefully unpacking the EZ Wiring Harness from its box or packaging. Inspect the harness for any visible damage or defects.
Next, lay out all components on a clean, flat surface to ensure everything is accounted for.
Organize the wires by their color-coded labels, grouping them by function or circuit type.
Use zip ties or clips to keep the harness tidy, preventing tangles or kinks.
Label each wire if needed, using the provided wiring diagram as a reference.
Finally, prepare your tools and workspace, ensuring all materials are within reach before proceeding to the next installation step.
This systematic approach ensures a smooth and efficient installation process.
4.2 Connecting the Battery and Power Leads
Begin by locating the vehicle’s battery and identifying the positive (+) and negative (-) terminals. Refer to the wiring diagram to determine the correct power lead connections.
Attach the main power lead from the harness to the positive terminal, securing it firmly with the provided bolt or nut. Tighten it thoroughly to ensure a solid connection.
Next, locate the negative (-) lead, which typically connects to the vehicle’s chassis or a grounding point.
Ensure the connection is clean and free of corrosion for optimal conductivity. If the ignition is on, disconnect the battery before making any connections to avoid electrical shocks or short circuits. Finally, double-check all connections to confirm they are secure and properly routed. This step is critical for powering up the entire electrical system. Always follow safety guidelines when handling battery connections.
4.3 Installing the Fuse Panel
The fuse panel is essential for protecting the electrical system from overcurrent conditions. Mount the fuse panel in an accessible location, ideally close to the battery to minimize power lead length. Use the provided screws or adhesive mounts to secure it firmly to the vehicle’s frame or a suitable surface. Ensure the panel is level and protected from moisture or extreme temperatures.
Connect the main power lead from the battery to the fuse panel’s input terminal, ensuring a snug and secure connection. Tighten all terminals properly to avoid voltage drops or overheating. For vehicles with multiple circuits, install fuses or circuit breakers as per the wiring diagram specifications. Replace any pre-installed fuses with the appropriate rating for your specific application. Finally, connect the ground wire to a clean, bare metal surface on the chassis or engine block. Double-check all connections to ensure they are secure and properly insulated before proceeding. This step ensures safe and reliable power distribution throughout the vehicle.
4.4 Routing Wires Through the Vehicle
Properly routing wires ensures a clean, organized, and durable installation. Begin by planning the wire paths to avoid interference with moving parts, heat sources, or corrosive environments. Use zip ties or adhesive clips to secure wires to existing vehicle components, such as the frame or interior panels. Protect wires from abrasion by routing them through grommets or protective sleeves, especially when passing through metal or sharp edges. For exterior or high-temperature areas, use heat-resistant wire sleeves or wrap wires with heat tape. Avoid over-tightening wires, as this may damage the insulation or restrict movement. Ground wires should be routed directly to metal surfaces, ensuring a clean, bare connection point. Finally, double-check all wire routes to confirm they are secure, well-insulated, and properly connected before moving on to the next step. This ensures long-term reliability and safety of the electrical system.
4.5 Connecting Circuit Components
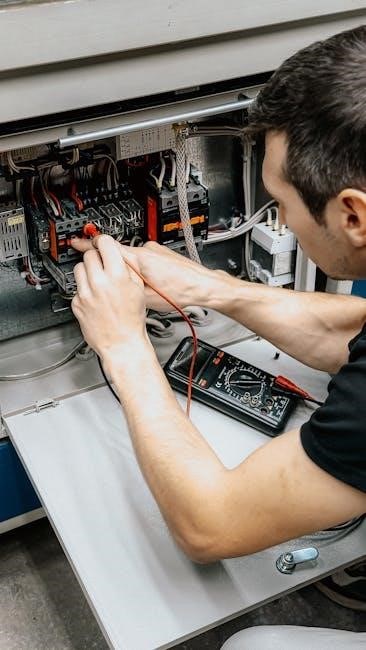
Connecting circuit components requires precision to ensure proper functionality. Begin by identifying each component based on the wiring diagram and its designated connector. Match the wires to their corresponding components using the color coding provided in the harness. For components with multiple wires, ensure each is connected to the correct terminal. Use crimping tools or soldering techniques to secure connections, avoiding loose or corroded terminals. After connecting, test each circuit individually to verify power and ground connections. If a component has a built-in fuse, install it only after confirming the circuit works correctly. Always disconnect the battery when working on live circuits to prevent accidental short circuits. Double-check all connections for tightness and proper alignment before finalizing. This step ensures reliability and prevents future electrical issues. Proper connection is critical for safety and performance.
4.6 Testing Each Circuit
Testing each circuit is essential to ensure the wiring harness functions correctly. Begin by reconnecting the battery and turning the ignition to the “on” position. Use a multimeter to verify voltage at key points, such as the fuse panel and circuit components. Test each circuit individually, starting with the most critical systems like headlights and brakes. Check for proper ground connections by measuring resistance between ground wires and the vehicle chassis. If a circuit fails to activate, inspect connections for looseness or corrosion. Use the wiring diagram to trace and identify potential issues. Test circuits under load, such as turning on high-beam headlights or activating the wipers, to ensure they handle current demands. Address any malfunctions before proceeding to the next circuit. This step ensures reliability and prevents future electrical failures. Proper testing guarantees a safe and functional installation.
Troubleshooting Common Issues

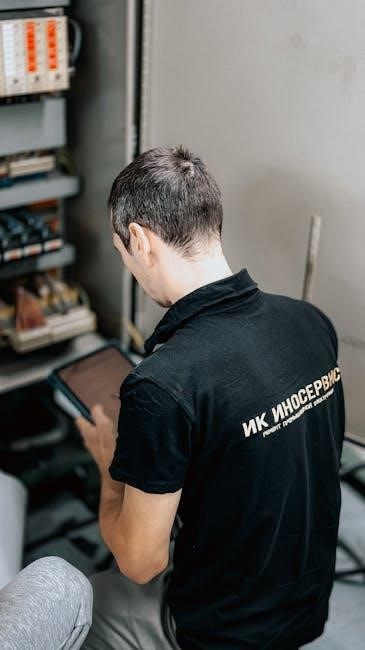
Identify symptoms, inspect connections, and use diagnostic tools like multimeters to locate faults. Consult the wiring diagram to trace circuits and resolve issues efficiently.
5.1 Identifying Faulty Connections
To identify faulty connections, start by visually inspecting all wiring and connectors for signs of damage, corrosion, or loose terminals. Use a multimeter to test continuity between connected points, ensuring no open circuits. Check for unintended resistance, which may indicate a short circuit. Verify that all ground wires are securely attached, as poor grounding is a common issue. Refer to the wiring diagram to confirm proper connections and ensure no wires are crossed or misconnected. If a circuit isn’t functioning, isolate the components one by one to pinpoint the fault. Use a process of elimination to trace the wiring and identify where the signal is lost. Always test connections before powering up the system to avoid further damage. Regular inspection and maintenance can help prevent such issues from arising.
5.2 Diagnosing Blown Fuses
Diagnosing blown fuses in an EZ Wiring Harness begins with identifying the fuse panel location, typically near the battery or under the dash. Open the panel and inspect each fuse for visible signs of damage, such as a broken filament or discoloration. Use a multimeter to test continuity across the fuse terminals; no reading indicates a blown fuse. Common causes include overloaded circuits, short circuits, or faulty components drawing excess power. Always disconnect the battery before replacing a fuse to prevent further damage. If a fuse blows repeatedly, trace the circuit to identify the root cause, such as a shorted wire or malfunctioning device. Replace the fuse with one of the correct amperage rating to avoid damaging the wiring or components. Regular inspection of fuses and circuits can help prevent recurring issues.

5.3 Resolving Grounding Problems
Grounding issues are common in wiring harness installations and can cause malfunctions or electrical noise. Start by inspecting all ground wires and connections for cleanliness and tightness. Corrosion or loose terminals can disrupt the grounding circuit. Use a wire brush to clean corroded points and ensure all connections are secure. Verify that ground wires are properly attached to metal surfaces, free from paint or debris. If a ground wire is damaged, replace it with a new one of the same gauge. Use a multimeter to test continuity between the ground point and the vehicle’s chassis. A lack of continuity indicates a broken ground. For multiple ground issues, check the main grounding strap or battery ground cable. Replacing the battery ground cable may resolve widespread grounding problems. Regularly inspect and maintain ground connections to prevent future issues.
5.4 Fixing Malfunctioning Components
Malfunctioning components in the EZ wiring harness can disrupt the entire electrical system. Start by identifying the faulty component using a multimeter to test for continuity, voltage, or resistance. Common issues include blown fuses, faulty relays, or damaged sensors. Replace the component with an identical or compatible part, ensuring proper connections. For fuses, check the rating and replace with the correct type. If a relay is malfunctioning, swap it with a new one, ensuring the wiring pins match. For sensors, clean or replace them as needed. After replacing the component, reconnect the battery and test the circuit to confirm proper function. If the issue persists, inspect the wiring for damage or corrosion. Regularly checking and maintaining components can prevent future malfunctions. Always follow the manufacturer’s guidelines for replacement and testing to ensure reliability and safety.

Maintenance and Upkeep
Regular maintenance ensures the EZ wiring harness functions optimally. Inspect connections, clean corrosion, and protect wires from moisture. Replace worn components promptly to prevent electrical issues.
6.1 Cleaning the Wiring Harness
Cleaning the EZ wiring harness is essential for maintaining its performance and longevity. Start by gently brushing off dirt or debris using a soft-bristle brush. Avoid harsh chemicals or abrasive materials that could damage the wires or insulation. Instead, use a mild electrical cleaner specifically designed for automotive wiring. Spray the cleaner onto a cloth and wipe down each wire and connector, ensuring no residue remains. For tougher grime, lightly dampen the cloth with distilled water, but avoid soaking the harness. After cleaning, inspect for any signs of wear or cracking. Allow the harness to air dry completely before reconnecting it to the vehicle’s electrical system. Regular cleaning prevents corrosion and ensures reliable electrical connections. Always handle the harness with care to prevent unnecessary stress on the wires or connectors.
6.2 Inspecting for Wear and Tear
Regularly inspecting the EZ wiring harness for wear and tear is crucial to ensure reliability and prevent electrical failures. Start by visually examining the wires, connectors, and terminals for signs of fraying, cracking, or corrosion. Pay particular attention to areas exposed to heat, moisture, or vibrations, as these are common stress points. Check all connections to ensure they are secure and not loose. Use a multimeter or circuit tester to verify the integrity of each circuit if you suspect damage. Look for discoloration or burn marks, which may indicate overloaded circuits or shorted wires. If any damage is found, address it immediately by repairing or replacing the affected components. Regular inspections can help prevent minor issues from becoming major problems. Always refer to your EZ wiring harness instructions for specific guidance on inspection and maintenance.
6.3 Upgrading or Adding Circuits

Upgrading or adding circuits to your EZ wiring harness is a straightforward process when done correctly. Always start by assessing your current setup to determine the best way to integrate new components. Ensure the new circuit aligns with the harness’s capacity and does not overload the system. Use high-quality wires, connectors, and circuit breakers to maintain reliability. When adding a circuit, follow the manufacturer’s instructions for proper connection points. Grounding is critical, so verify all ground wires are securely attached. After installation, test the new circuit thoroughly to ensure it functions as expected. If unsure, consult a professional or refer to your EZ wiring harness instructions for guidance. Regularly review and update your wiring diagram to reflect any changes. This ensures future modifications are easier and safer to perform. Always prioritize safety and precision when upgrading your electrical system.
Completing the EZ wiring harness installation ensures reliable electrical system performance. Properly following the instructions guarantees safety and functionality, allowing for seamless future modifications and upgrades with confidence.
7.1 Final Check and Verification
Once the installation is complete, perform a thorough final check to ensure all components are correctly connected and functioning as intended. Start by turning the ignition to the “on” position and testing each circuit individually, such as headlights, wipers, and accessory systems, to confirm proper operation. Verify that all fuses are securely seated and that no blown fuses indicate overloaded circuits. Inspect all wire connections for tightness and signs of damage, ensuring no loose terminals or chafed insulation. Check the battery terminals for a clean, secure connection and confirm that the grounding wires are properly attached to prevent electrical interference. Finally, review the entire installation to ensure it adheres to the EZ wiring harness instructions and safety guidelines. This step is critical for ensuring reliability, performance, and long-term durability of the electrical system.
7.2 Tips for Future Modifications
When planning future modifications to your wiring system, always start by thoroughly reviewing the EZ wiring harness instructions to ensure compatibility and safety. Create a detailed wiring diagram to map out changes, helping you visualize the electrical flow and identify potential conflicts. Use high-quality tools and materials to maintain system reliability. Label all new wires clearly to simplify future troubleshooting. Test each modification incrementally to catch and resolve issues early. Consider upgrading fuses or circuit breakers if adding high-power components. Keep the wiring harness organized to prevent tangles and damage. Regularly inspect and clean connections to maintain optimal performance. If unsure, consult a professional or seek guidance from automotive electrical specialists. By following these tips, you can ensure safe and efficient upgrades while preserving the integrity of your wiring system.